Saturday, October 6, 2012

Breast Cancer Awareness Month Nails

In honor of Breast Cancer Awareness Month I decided to do a nail design with the pink ribbon


1. I painted my nails white. 
2. I went over all of the nails with Revlon's whimsical to add a sheer blue tint and fun pastel glitter. 
3. I took a pink striper brush and created small strokes across the pointer, ring, and pinky fingers.
4. On the ring finger I created the ribbon.
5. I wrote "hope" on the thumb with the striper.
6. I took a black striper and create thin lines around the pink.
7. I waited for it to dry and added a topcoat :)


Tuesday, July 24, 2012

Essie Pennytalk Review

OMG! I have never hated a nail polish before this. I was so excited about this because it's a rose gold nail polish! But I tried it on and I hate it so much. I took it off and I'm going to go and try to return it. It has an inconsistent, thick, goopy consistency. The color dries really funny and it goes on very uneven. Overall, the color is just really icky looking too. It doesn't look like rose gold at all. So disappointed! :(

Sunday, July 22, 2012

Revlon Colorstay Whipped Foundation Review


Overall: I never bought the regular Revlon Colorstay foundation, but I tried it on at my cousin's house before. The foundation had good coverage, but it left my skin looking a little bit cakey and definitely not natural. The whipped foundation is the complete opposite! It has such amazing coverage, and is so blend-able, but has a very skin like finish. It isn't too dewey, but isn't matte either. It's the perfect balance between matte and glowy. I have definitely noticed a difference between my other foundations and this one. My skin look clearer, and the foundation doesn't fade throughout the day. I highly recommend this product!

Swatch: I have the foundation in the color Sand Beige


Product claims: REvlon claims that this product is 24 hours. I don't think any product is, or should, be able to last for 24 hours. However, this product has amazing staying power. It isn't cakey, and isn't too heavy, and has a really natural finish.

Packaging: Overall, the packaging is nice in terms of looks. The appearance looks like it is more expensive than it actually is. However, although it's nice to have a luxurious looking container it isn't very practical. It is difficult to travel with and the extra packaging is such a waste. I would've preferred a lighter weight container with less packaging waste. But the products is so good that I would repurchase it despite the obnoxious packaging.


Application: I just dab on a small amount onto different sections of my ace and blend it out with my fingers. I also tried applying it with y fingers and then blending it out with my sigma f80 flat top kabuki brush, but I think the brush soaks up the product and doesn't really blend it out as well as with my fingers. I don't really set the foundation because of the amazing staying power. Throughout the day sometimes I touchup and powder through my t-zone, but it isn't really necessary to powder this foundation.


Friday, June 22, 2012

Pink Cheetah Nail Design

This pink cheetah nail design is really easy and pretty for summer :)


1. Start out by applying a base coat on all nails. 
2. Make a rough white tip on nails, one at a time, and while its still wet take a makeup sponge and go over the tip to blend out the edges.
3. Take a shimmery white color, I used "My Private Palace" from Jessie's Girl JulieG collection and it worked perfectly! I blended out the white tip and had the shimmer on both the white and the base of the nail. (As a side note I love this color! It's so pretty in lots of nail looks and just over lots of different polishes. I'm pretty sure you can get her collection at Rite Aids and Walgreens, but I got mine at IMATS. I highly recommend this color though!!)
4. Next, take a pink, or any bright color, and make small circular blotches on on the white. I used OPI "Kiss Me On My Tulips". Don't make the pink blotches to orderly or in any type of pattern, the randomness is what makes it look better. 
5. Taking a toothpick and black nail polish, make small semi circles around the pink. Also make some small black blotches where it looks too empty. 
6. Wait for all nails to dry and then apply a topcoat. 


These AMAZING photos were taken by my friend Akshay! Her photography skills are cray! 

Go to her blog, http://openeyesopenlens.wordpress.com/ to see more of her insane photos!! And ones that are a little bit more artistic and interesting then nails, even though personally I can't think of anything as fun to look at as nail art but I'm pretty sure it's just me...so GO CHECK HER BLOG!! :D


Thursday, June 14, 2012

Ombre and Animal Print Nail Design

This is a fun design I did for summer.

1. Start out by applying one coat of white nail polish to all nails. 
2. Then choose three colors, and apply them onto a makeup sponge wedge in rows.
3. Sponge the colors on to create the ombre effect.
4. Apply a topcoat before all of the nails completely dry to help blend them together.
5. Once dry, take a tooth pick with black nail polish, and carefully draw on the animal print. Make zebra stripes in some places and cheetah spots in others.
6. Wait for the nails to dry, and then apply a top coat to all of the nails.

Monday, May 14, 2012

April Showers Bring May Flowers (spring nail design)


1. Start out with a gradient of blue/grey polishes. On my thumb I used one coat of black, and one coat o a charcoal grey (both shades of season colors). On my index finger, I first applied the charcoal grey and then two coats of OPI's I Don't Give a Rotterdam. On my middle finger I used one coat of Zoya Kristen. Then on the ringer finger and pinky finger I put on the light blue from the Shades of Season set.

2. On the thumb and index finger i applied cloud-like blobs with Zoya Kristen. On my middle finger I made cloud-like blobs with white.

3. I used a Navy blue polish and a toothpick to make raindrops on the stormy nails. 

4. On the bright nails, I used a toothpick and green polish, and a green striper polish, to make grass. 

5. Then I took a bright pink (Spoiled Plastic Flamingo) and neon orange (Orly Melt Your Popsicle) to make flowers.

6. I let all nails dry and finished up with a topcoat to seal in the design.

Friday, April 6, 2012

Passover Nail Art

Heres a fun Passover inspired nail design.

1. Start by applying a base coat and then two coats of a sheet pink as the base for all the nails. 
2. On the thumbs, create two small wine glass shapes on each thumb. 
3. One one hand, paint a small bone with a white striper brush on one nail. Make a small line and then two circular ends on each end of the line(this is supposed to be like the shank bone on the seder plate). On another nail on that hand, take a green nail polish and make small blobs with ragged edges(for the lettuce). You can even take your finger tip and smudge the edges a little bit to help it smudge. On the remaining nail, create a small apple shape with a red striper brush(the apple is for the charoset). 
4. On the other hand, choose one nail and create the same thing with the green polish(the bitter herb). Then on another nail, make a small white oval(for the egg). On the other nail, create a small purple circle (the beginning of the onion). 
5. Paint your pink nails a beige color. 
6. Start adding in the details to each nail design. On the lettuce and bitter herbs, add value with different shades of green. On the apple, add a green leave stem. On the onion use w white striper brush and create white circular lines. In the wine glasses, use a red striper brush to create the wine dripping out of the glasses. 
7. Turn the beige on the pinkies into matza by adding white and black lines. 
8. To finish off the design, choose one hand and write passover in hebrew, and matza on the opposite hand. 


Thursday, April 5, 2012

Easter Spring Nail Design

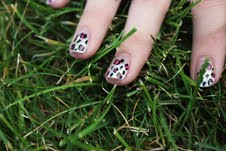
This is an Easter/Spring inspired nail design.


1. Decide which two nails will be your bunny and chick, and paint the nails pastel colors of your choice.
2. On the bunny nail, paint a white circular tip, and then take a striper brush and paint two white stripes coming out of the top of the circle.
3. While you wait for the white to dry, start making easter egg designs on the other nails, leaving one out to be the chick. Using the other pastel colors make polk-a-dots and stripes. For example, on the green nail use pink, blue, and purple. On pink, use purple, blue yellow...etc. Use a toothpick or back of a nail art brush to do this.
4. Using a tooth pick, put smaller pink stripes inside of the white stripes for the ears on the bunny. Make a small pink circle for the nose at the middle of the tip of your nail. Take black, and create to small circles for the eyes. Make two little lines coming out of the nose for whiskers. 
5. Start off the chick by painting a yellow circular tip. After that dries, use a white striper brush to create a half egg shape on top of it, so the chick's head look like it's peeking through. Create a circular line following you nail first, then make small triangular tips to look like a cracked egg shell. 
6. Add two small black eyes and a little orange beak. 

I did this easter look on y friend, but another fun spring inspired design is to just paint bunny tips on all of your nails. I did it on myself and it wasn't hard at all. You can use a pastel as the background, or a sheer pink like I did. 


Monday, March 19, 2012

Breakfast At Tiffany's Nails


1. Start off by applying a base coat to all nails.
2. Then, apply a sheer pink nail polish to all the nails as well. 
3. Paint a black tip on all nails except your ring finger.
4. Apply a silver polish with a striping brush at the edge of the black tip, this also fixes any mistakes you may have made when painting on the black tip. 
5. Print out the picture, and cut it around the edges. Apply a thick coat of top coat on top of the ring finger nail. Then, place the picture carefully on top of the nail. Hold it down until it sticks. It may take a while, and its really frustrating, just keep holding it down until it sticks. 
6. Once the picture stays down, place a thick layer of topcoat over it. You may need an extra coat on to,or just in certain sections that won't stay down.
7. Apply a top coat to the rest of the nails as well.